In this tutorial you learn how to create user interfaces that respond to the changes of the device screen resolution. A user interface with a dynamic layout looks good and is easy to use regardless of the device and its screen resolution.
This video shows the result of the tutorial.
This tutorial assumes you understand the basics of working with Kanzi Studio. The best entry points for getting familiar with Kanzi Studio are:
The <KanziWorkspace>/Tutorials/Dynamic layout/Completed directory contains the completed project of this tutorial.
The starting point of this tutorial is the Dynamic layout.kzprojKanzi Studio project file stored in the <KanziWorkspace>/Tutorials/Dynamic layout/Assets directory.
User interfaces with dynamic layout respond to changes in device screen orientation and resolution. Grid Layout nodes form the base of dynamic layouts. To make your Kanzi application layout dynamic, you have to place inside Grid Layout nodes all content for which you want that it responds to the changes in the screen resolution. Then you set up the Grid Layout nodes so that they position and distribute the content the way you want.
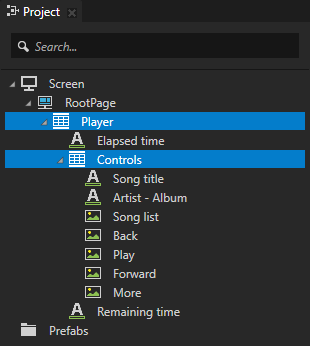
The project contains the two Grid Layout 2D nodes you need to complete this tutorial:
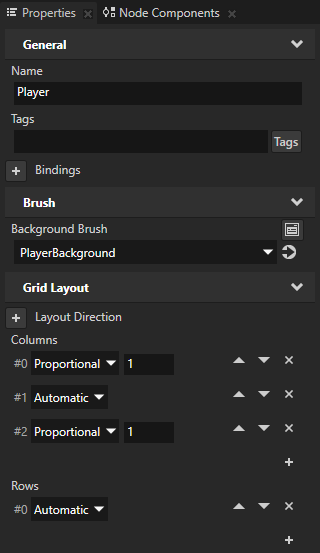
PlayerGrid Layout 2D node sets the position and size of the media player application (the content with white background). The node contains three columns:
The first and third column are set to Proportional with value 1 so that their size is the same in proportion to each other and the size of the entire PlayerGrid Layout node. These columns contain the elapsed and remaining times of the currently playing song.
The middle column is set to Automatic so that Kanzi sets its size based on the size of the node in that column. This column contains the song information and player controls.
ControlsGrid Layout 2D node sets the position of the song title, artist and album name, and the controls of the player. The node's columns and rows are set to Proportional with value 1 so that their size is the same in proportion to each other and the size of the entire ControlsGrid Layout 2D node.
Make the layout of the user interface dynamic
In this section you make the layout of the user interface (Player and ControlsGrid Layout 2D nodes) respond to the changes of the device screen orientation and resolution.
In this project the RootPage fills the entire device screen. Because the size of the RootPage node changes with the device resolution, use its height and width as a base for setting the dimensions of nodes in your user interface.
To make the layout of the user interface responsive:
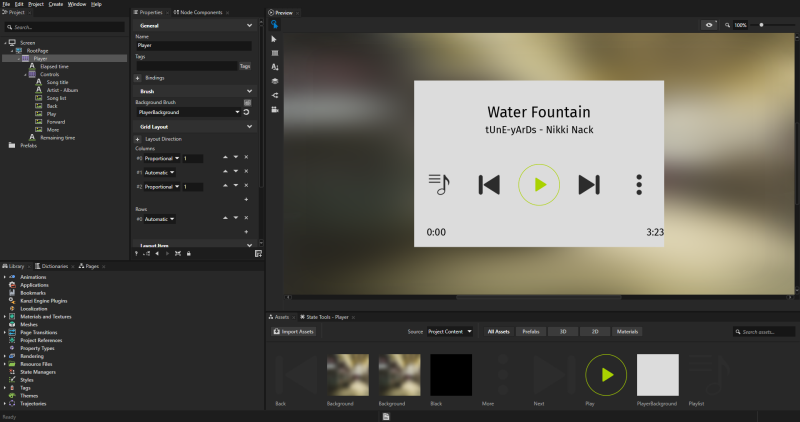
In Kanzi Studio open the project stored in the <KanziWorkspace>/Tutorials/Dynamic layout/Assets directory.
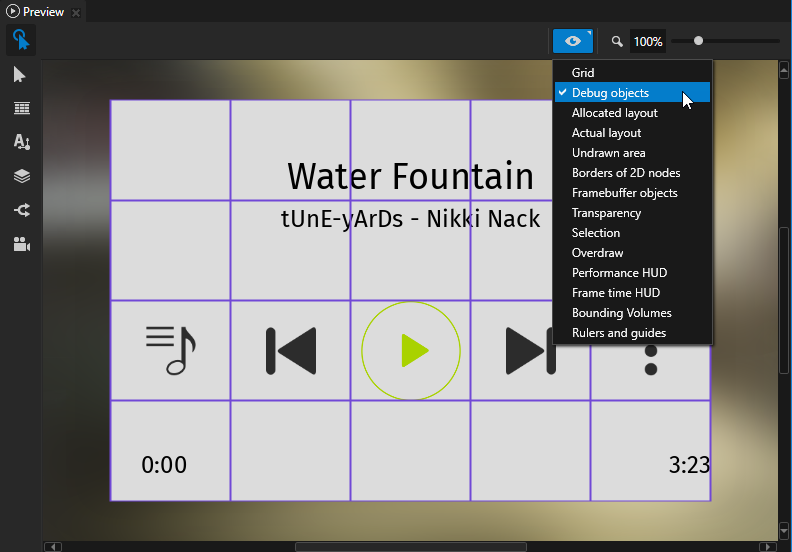
(Optional) In the Preview click to enter the Analyze mode, right-click , and select Debug objects. This way you visualize the columns and rows of Grid Layout nodes.
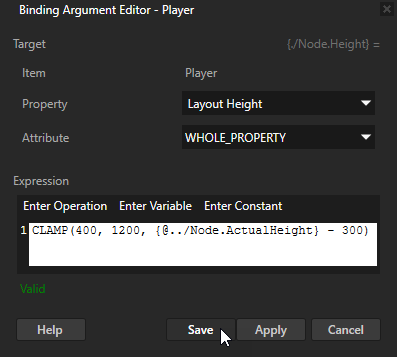
In the Project select the Player node, in the Properties add the Bindings property, and in the Binding Argument Editor set:
Property to Layout Height
Expression to
CLAMP(400, 1200, {@../Node.ActualHeight} - 300)
Click Save. The PlayerGrid Layout 2D node sets the position and size of the media player application (the content with white background). This binding sets the height of the node based on the height of the RootPage node. You use the Clamp() binding function to constrain the height of the Player node:
The node is 300 pixels lower than the height of the RootPage node. Because the Vertical Alignment property of the Player node is set to Center, this creates a 300-pixel margin on top and bottom.
The node is never lower than 400 pixels and higher than 1200 pixels.
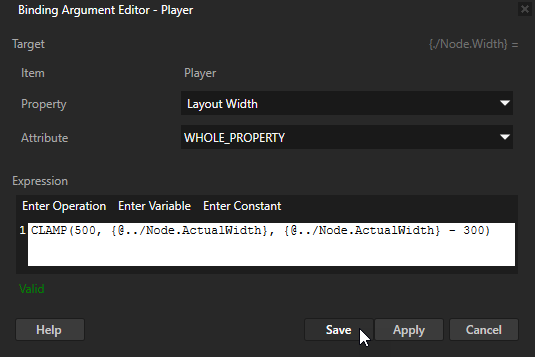
In the Project select the Player node, in the Properties click + Add Binding, and in the Binding Argument Editor set:
Click Save. This binding sets the width of the PlayerGrid Layout 2D node based on the width of the RootPage node. You use the Clamp() binding function to constrain the width of the Player node:
The node is 300 pixels narrower than the width of the RootPage node. Because the Horizontal Alignment property of the Player node is set to Center, this creates a 300-pixel margin on the left and right.
The node is never narrower than 500 pixels.
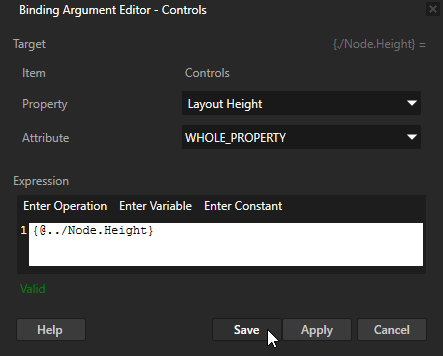
In the Project select the Controls node, in the Properties add the Bindings property, and in the Binding Argument Editor set:
Property to Layout Height
Expression to
{@../Node.Height}
Click Save. The ControlsGrid Layout 2D node sets the position and size of the song title, artist and album name, and the controls of the player. This binding sets the height of the Controls node to be the same as the height of the Player node.
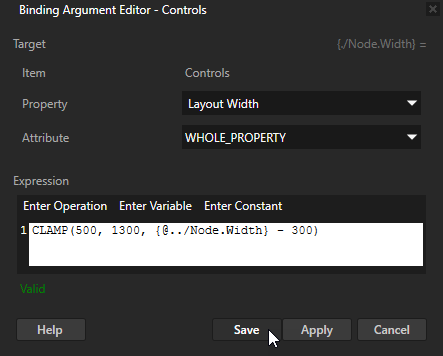
In the Project select the Controls node, in the Properties click + Add Binding, and in the Binding Argument Editor set:
Property to Layout Width
Expression to
CLAMP(500, 1300, {@../Node.Width} - 300)
Click Save. This binding sets the width of the ControlsGrid Layout 2D node based on the width of the Player node. You use the Clamp() binding function to constrain the width of the Controls node:
The node is 300 pixels narrower than the width of the Player node. Because the Horizontal Alignment property of the Controls node is set to Center, this creates a 300-pixel margin on the left and right.
The node is never narrower than 500 pixels and wider than 1300 pixels.
Make the content in the user interface responsive
In this section you make the content of the ControlsGrid Layout 2D node respond to the changes of the device screen orientation and resolution. That way the controls in the user interface change with changes of the screen resolution.
To make the content in the user interface responsive:
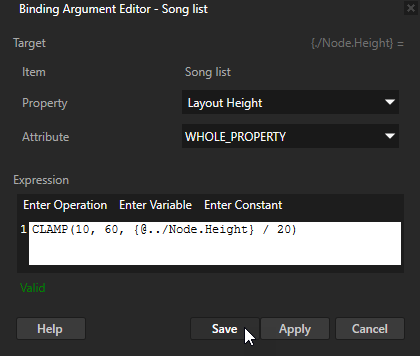
In the Project select the Song listImage node, in the Properties add the Bindings property, and in the Binding Argument Editor set:
Property to Layout Height
Expression to
CLAMP(10, 60, {@../Node.Height} / 20)
Click Save. The Song listImage node is the leftmost control in the player controls. This binding sets the height of the Song listImage node based on the height of the Controls node. You use the Clamp() binding function to constrain the height of the Song list node:
The node height is one fifth of the height the Controls node.
The node is never shorter than 10 pixels and higher than 60 pixels.
Repeat the previous step for the Layout Width property of the Song list node, and use this binding expression:
CLAMP(10, 60, {@../Node.Width} / 20)
Click Save. This result of this binding is the same as for the binding in the previous step, but sets the Layout Width of the Song list node.
Apply the same bindings you created in the Song list node to the other Image nodes in the Controls node.
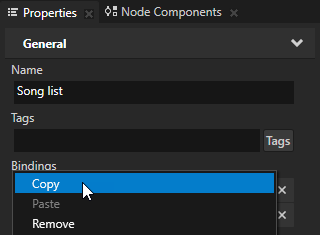
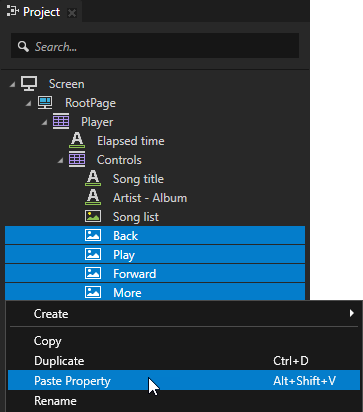
In the Project select the Song list node, in the Properties right-click the Bindings property, and select Copy.
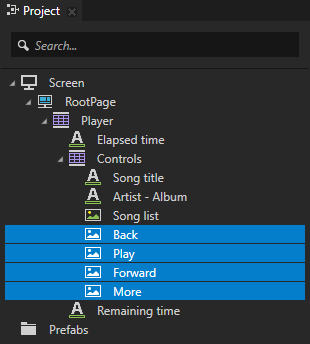
In the Project press Ctrl and click Back, Play, Forward, and More nodes.
In the Project right-click the selected nodes and select Paste Property. In this way you can add and apply the copied Bindings property and its bindings to all selected nodes.
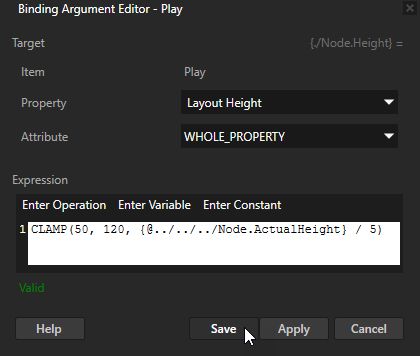
In the Project select the PlayImage node, in the Properties click the Layout Height binding, and in the Binding Argument Editor set Expression to
CLAMP(50, 120, {@../../../Node.ActualHeight} / 5)
Click Save. This binding sets the height of the PlayImage node based on the height of the RootPage node. With this binding the size of the Play node changes differently from the other nodes in the Controls node.
Repeat the previous step for the Layout Width property of the Play node, and use this binding expression:
CLAMP(50, 120, {@../../../Node.ActualWidth} / 5)
Click Save.
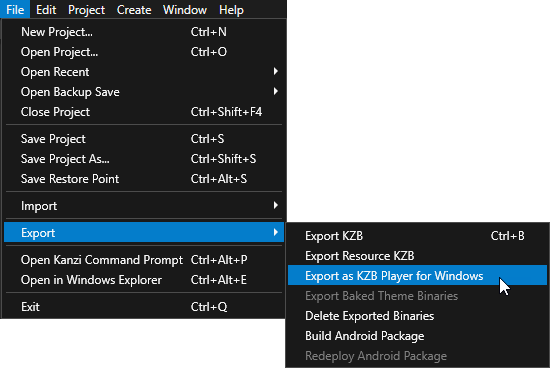
In Kanzi Studio select File > Export > Export as KZB Player for Windows and open the .exe file of the application in the <ProjectName>/Application Player directory. When you adjust the size of the application window you simulate the changes in the resolution of the device screen. Notice how the size of the user interface changes according to the bindings you created in the project.
What's next?
In this tutorial you learned how to create a user interface the size of which responds to the changes of the device screen resolution. This project contains Text Block nodes the text of which stays the same regardless of the changes in the device screen resolution. You can use the approach you learned in this tutorial to make the size of the text in the Text Block nodes respond to the changes of the device screen resolution.
You can also:
Learn how to control the position of gauge needles with custom properties. See Tutorial: Create gauges.

 to enter the
  , and select